Hey there! It’s Sergey, co-founder and CTO at Masthead Data. With the recent changes in pricing for the dbt Cloud version, I realized there might be a growing need for some in-depth resources on alternative solutions. Thus, I’ve taken the initiative to craft this comprehensive guide, specifically tailored for those looking to seamlessly run dbt core on Google BigQuery.
How to run dbt + Airflow on Google Cloud
Cloud Composer is an Apache Airflow managed service widely used by data teams.
dbt is an open-source data transformation tool that facilitates the alteration of data within data warehouses to support reporting, machine learning (ML) modeling, and operational analytics through SQL. There is also a dbt Cloud licensed version which can run your models, tests and schedule executions without the need of Airflow. But there are several use cases that Airflow might be a better choice.
Why dbt + Airflow?
Airflow and dbt share the same high-level purpose: to help teams deliver reliable data to the people they work with, using a common interface to collaborate on that work.
Airflow is an orchestration solution that juggles tasks, extracts data, and loads it into BigQuery. Meanwhile, dbt is responsible for transforming data that has already landed in BigQuery.
If you have experience with dbt, you’re likely aware of how dbt Cloud can handle scheduling of models and tests, executing them in the correct sequence, and sending failure notifications, all without the need for Airflow. However, there are a few reasons you might consider using Airflow to orchestrate your dbt jobs:
- You have significant experience using Airflow or already implemented it in your stack and use it to orchestrate your pipelines within Google Cloud project
- You need to run any process outside of dbt Cloud and trigger it after some dbt job is completed
- You want flexibility in managing your dbt jobs (e.g. run one dbt job only after another has completed)
How to set up dbt + Airflow with BigQuery external tables from a .csv file
In this guide, we are going to set up Python, install dbt, create a demo project, and run it on our local machine in connection with Google BigQuery. Also, we will deploy DAG to Google Cloud Composer and run all dbt models on Airflow. Raw data will be loaded from a .csv file to BigQuery external table.
Environment installation
Open a Terminal window to check if pyenv and python are already installed and install them if needed.
You can check if they are already installed by running SCRIPT. If the Terminal prints version numbers for pyenv and python, they are installed and you may proceed to creating the project.
$ pyenv -v
pyenv 2.3.19

$ python3 -V
Python 3.10.11
The preferred option for installing pyenv is using brew:
$ brew install pyenvAfter successful installation, we need to add a command to initialize pyenv during terminal startup.
For macOS:
$ echo 'eval "$(pyenv init -)"' >> ~/.zshrcFor Linux:
$ echo 'eval "$(pyenv init -)"' >> ~/.bashrcTo install python, please execute the command below. For this tutorial, we will be using version 3.10.4
$ pyenv install 3.10.4Install dbt-bigquery
$ pip install dbt-bigquerypip install dbt-bigquery will also install dbt core.
Project configuration
After the environment has been successfully set up, you can initialize a new dbt project. To do that, simply run the dbt init shell command in your terminal.
$ stkachov@MacBook-Pro ~/demo-dbt> dbt init demo_dbtThe setup wizard will ask you to select the database to use in your dbt project. Type 1 to select bigquery:
18:55:37 Running with dbt=1.5.1
Which database would you like to use?
[1] bigquery
(Don‘t see the one you want? <https://docs.getdbt.com/docs/available-adapters>)
Enter a number: 1
Choose option 1 oauth as an authentication method to Google Cloud. For this demo we are going to use service account impersonation. More details about this authentication method can be found in Google documentation. In short this auth method will grant short-lived credentials for the target service account to execute the task. It is a much more secure way rather than using a service account key.
[1] oauth
[2] service_account
Desired authentication method option (enter a number): 1
Specify the project id, dataset, number of threads, job execution timeout and desired location.
project (GCP project id): gothic-sequence-307320
dataset (the name of your dbt dataset): dbt_dataset
threads (1 or more): 1
job_execution_timeout_seconds [300]: 300
[1] US
[2] EU
Desired location option (enter a number): 1
19:20:57  Profile demo_dbt written to /Users/stkachov/.dbt/profiles.yml using target’s profile_template.yml
and your supplied values. Run ‘dbt debug’ to validate the connection.
19:20:57
Your new dbt project “demo_dbt” was created!
For more information on how to configure the profiles.yml file,
please consult the dbt documentation here:
 <https://docs.getdbt.com/docs/configure-your-profile>
One more thing:
Need help? Don’t hesitate to reach out to us via GitHub issues or on Slack: <https://community.getdbt.com/>
Happy modeling!
After successfully completing initiation of the dbt project, the environment configuration and connection profile configuration was saved to file /Users/stkachov/.dbt/profiles.yml (more about dbt connection profiles could be found here.)
This file is used by default and exists in a different folder to make sure that no sensitive data like connection credentials will occur in the directory of the git repository. But since we are going to deploy our application to the Google Cloud we would need to define additional connection details to it.
Under the root of your dbt project let’s create a new file profiles.yml. In this file we will define two configuration options to run dbt models on your local computer and on Google Cloud Composer with connection to Google Cloud.
demo_dbt: # this needs to match the profile in your dbt_project.yml file
target: dev
outputs:
dev:
type: bigquery
method: oauth
project: gothic-sequence-307320 # Replace this with your project id
dataset: dbt_dataset # Replace this with dbt_your_name, e.g. dbt_bilbo
impersonate_service_account: dbt-user@gothic-sequence-307320.iam.gserviceaccount.com # replace with
service account
prod:
type: bigquery
method: oauth
project: gothic-sequence-307320 # Replace this with your project id
dataset: dbt_dataset # Replace this with dbt_your_name, e.g. dbt_bilbo
“dev” profile (default) would use service account impersonation as an authentication method. “prod” profile will use a service account attached to Google Cloud Composer. More details about it later.
Service account impersonation is more secure way than a service account key. Service account key creates a high risk of credentials exposure and does not require prior authorisation. More about service account impersonation you can find here.
Under “dev” profile specify impersonate_service_account property with service account which you want to impersonate. For the local development it is much better to use oauth method with service account impersonation, because the impersonated service account (the target) would have necessary BigQuery access permissions rather than your personal account, which you are logged in with Google CLI gcloud on your computer.
Note. Make sure to grant your account, which you are currently using and logged in to Google CLI (gcloud), role Service Account Token Creator (roles/iam.serviceAccountTokenCreator)
Create a new service account, which you would like to impersonate, or use an already existing one. For the demo purpose we are going to create a new one.
Open your Google Cloud console and navigate to IAM. Open the Service Account menu and choose Create Service Account. Type the name of your service account. For demo purposes, we will grant the service account “BigQuery Admin” and “Storage Admin” roles to create tables and external in BigQuery. In addition, grant “Composer Worker” role. Later we will use this service account during deployment to the Cloud Composer environment to run Cloud Composer and run dbt models under “prod” target profile.
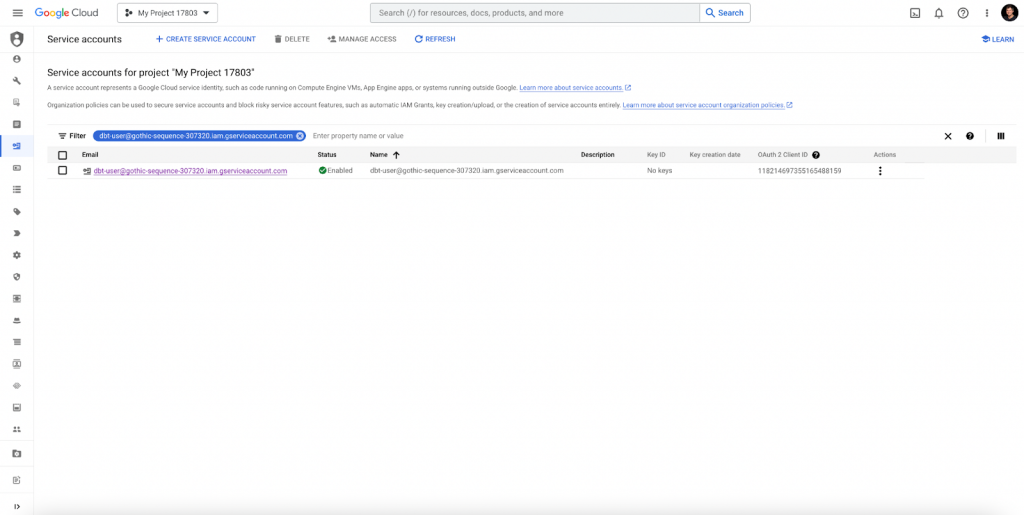
Later we will use this service account during deployment to the Cloud Composer environment to authenticate Cloud Composer and run dbt models under “prod“ target profile.
dbt files
The newly created dbt project will have the following structure. Take a look at the models folder, which has two samples of dbt models with a .sql extension.
 demo_dbt
| -README.md
| logs
| -dbt.log
| models
| example
| -schema.yml
| -my_first_dbt_model.sql
| -my_second_dbt_model.sql
| macros
| seeds
| analyses
| -dbt_project.yml
For demo purpose, let’s create a new table in BigQuery and delete all models from the newly created dbt project under the examples folder: my_first_dbt_model.sql, my_second_dbt_model.sql, and schema.yml.
Let’s create an external table in BigQuery by executing a query in the BigQuery console.
Prior to creating the table, upload the .csv file from the GitHub repository to your cloud storage and replace the reference to it in the uris array.
CREATE OR REPLACE EXTERNAL TABLE `dbt_dataset.mh_customers_raw` (
id STRING,
name STRING
)
OPTIONS (
format = ‘CSV’,
uris = [‘gs://mybucket/raw_customers.csv’], — replace with path to your csv file uploaded to cloud storage
skip_leading_rows = 1
);
After successfully creating an external BigQuery table, let’s create new models so they are able to consume data from it.
The ~/demo_dbt/models folder will contain the following new .sql scripts:
| models
  -customers.sql
  -stg_orders.sql
  -stg_stores.sql
  -selective_mid_customers_.sql
The full contents of these .sql files can be found in the GitHub repository
dbt run
Now, let’s run our dbt models in the project on the local computer. Open the Terminal and execute:
$ dbt runThe output should look like this:
stkachov@MacBook-Pro ~/I/demo_dbt (main)> dbt run


21:18:53  Running with dbt=1.5.1
21:18:53  Unable to do partial parsing because saved manifest not found. Starting full parse.
21:18:54  Found 4 models, 0 tests, 0 snapshots, 0 analyses, 353 macros, 0 operations, 1 seed file, 0 sources,
0 exposures, 0 metrics, 0 groups
21:18:54
21:18:57  Concurrency: 1 threads (target=‘dev’)
21:18:57
21:18:57  1 of 4 START sql table model dbt_dataset.stg_orders ………………………. [RUN]
21:19:04  1 of 4 OK created sql table model dbt_dataset.stg_orders ………………….. [CREATE TABLE
(49.0k rows, 16.3 MiB processed) in 6.17s]
21:19:04  2 of 4 START sql table model dbt_dataset.stg_stores ………………………. [RUN]
21:19:09  2 of 4 OK created sql table model dbt_dataset.stg_stores ………………….. [CREATE TABLE
(5.0 rows, 369.0 Bytes processed) in 5.09s]
21:19:09  3 of 4 START sql table model dbt_dataset.customers ……………………….. [RUN]
21:19:14  3 of 4 OK created sql table model dbt_dataset.customers …………………… [CREATE TABLE
(940.0 rows, 4.7 MiB processed) in 5.07s]
21:19:14  4 of 4 START sql table model dbt_dataset.selective_mid_customers_ ………….. [RUN]
21:19:19  4 of 4 OK created sql table model dbt_dataset.selective_mid_customers_ ……… [CREATE TABLE (
10.0 rows, 63.5 KiB processed) in 4.70s]
21:19:19
21:19:19  Finished running 4 table models in 0 hours 0 minutes and 24.46 seconds (24.46s).
21:19:19
21:19:19  Completed successfully
21:19:19
21:19:19  Done. PASS=4 WARN=0 ERROR=0 SKIP=0 TOTAL=4
Four new tables should appear in the dbt_dataset dataset in BigQuery. But we plan to deploy dbt in Cloud Composer and orchestrate it with Airflow. Let’s continue.
dbt docs
Run the command below to generate the manifest.json file.
$ dbt docs generateThis file contains all the information about your models, test, and dependencies. It can be found under the ~/target folder.
Cloud Composer with Airflow
Now we will create a Cloud Composer environment in Google Cloud console and set it up.
Open your Google Console and navigate to the Composer product (use search to find it.)
Click on CREATE, choose Composer 2, and fill in the required fields to create an environment.
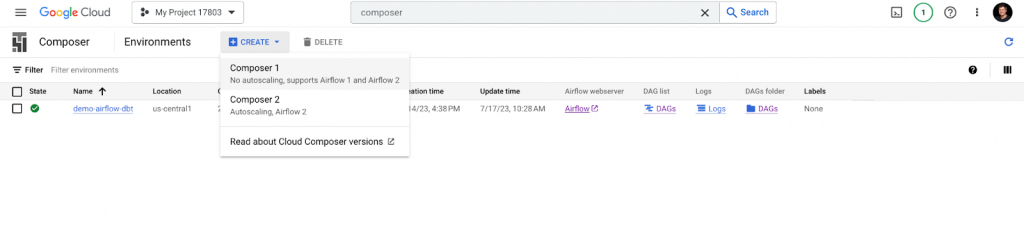
For demo purposes, we will complete the creation process with the minimum required resources.
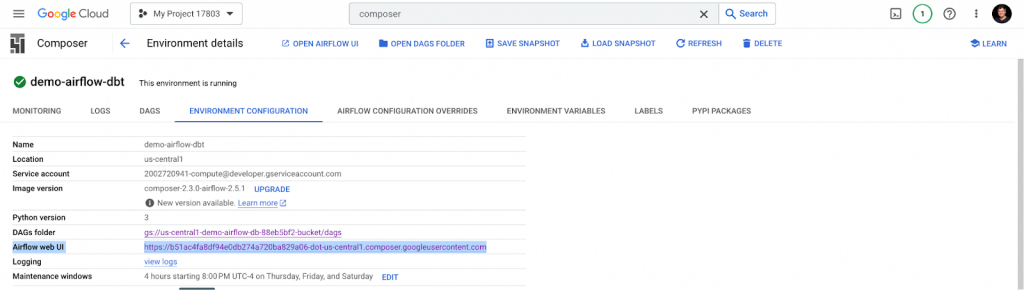
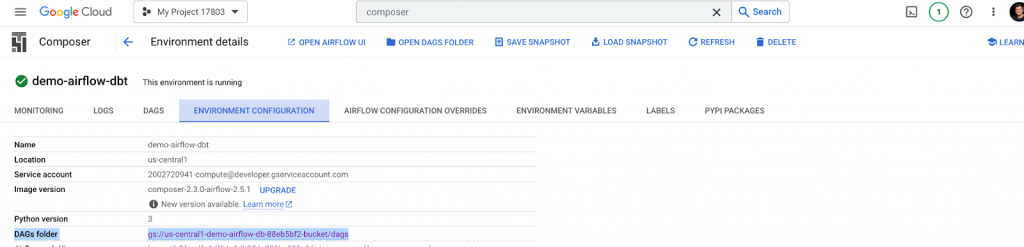
After successfully creating an environment, the Airflow UI is available with a link under Environment Configuration details.
By default, Airflow provides an example of the DAG.
Let’s proceed and add a new DAG. Create a new airflow/dags folder under the root of your project. Inside this folder, create a dbt_dag.py file with the following content.
import os
import json
import pendulum
from airflow import DAG
from airflow.operators.bash import BashOperator

HOME = os.environ[“HOME”] # retrieve the location of your home folder
manifest_path = os.path.join(“/home/airflow/gcs/data/”, “target/manifest.json”) # path to manifest.json

with open(manifest_path) as f: # Open manifest.json
  manifest = json.load(f) # Load its contents into a Python Dictionary
  nodes = manifest[“nodes”] # Extract just the nodes

# Build an Airflow DAG
with DAG(
  dag_id=“dbt_example”, # The name that shows up in the UI
  start_date=pendulum.today(), # Start date of the DAG
  schedule_interval=‘*/10 * * * *’,
  catchup=False,
) as dag:

  # Create a dict of Operators
  dbt_tasks = dict()
  for node_id, node_info in nodes.items():
      dbt_tasks[node_id] = BashOperator(
          task_id=“.”.join(
              [
                  node_info[“resource_type”],
                  node_info[“package_name”],
                  node_info[“name”],
              ]
          ),
          bash_command = “dbt run “
           + f” –models {node_info[‘name’]}“
           + f” –target prod”
      )

  # Define relationships between Operators
  #
  for node_id, node_info in nodes.items():
      if node_info[‘resource_type’]==‘model’:
        upstream_nodes = node_info[‘depends_on’][‘nodes’]
        if upstream_nodes:
            for upstream_node in upstream_nodes:
                dbt_tasks[upstream_node] >> dbt_tasks[node_id]

if __name__ == “__main__”:
  dag.cli()
What does this code do?
- Looks for the manifest.json file (we will upload it later to the Airflow home directory)
- Parses only models from manifest.json
- Runs the dbt run command with prod profile
Cloud Composer is linked to a GCS bucket where dbt models, dags, and other configuration files are stored. Let’s add these files. Open the link to the DAGs folder in a new browser tab.
/dags folder
The DAGs folder is stored in gs://bucket-name/dags, mapped to /home/airflow/gcs/dags. You should upload the newly created dbt_dag.py and dbt_project.yaml files to this folder.
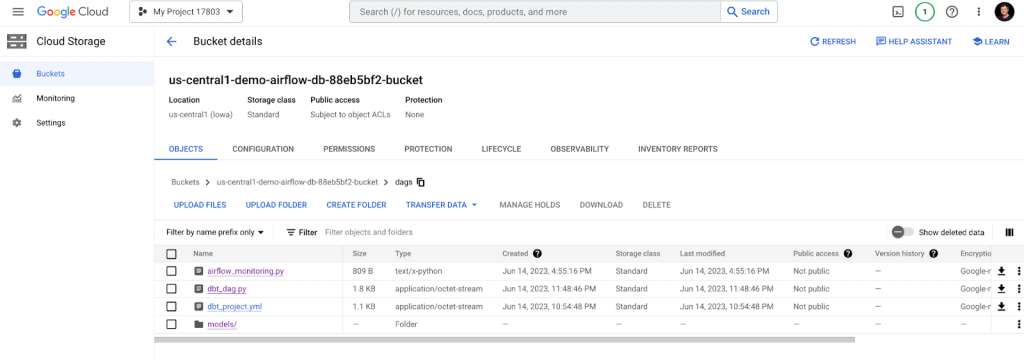
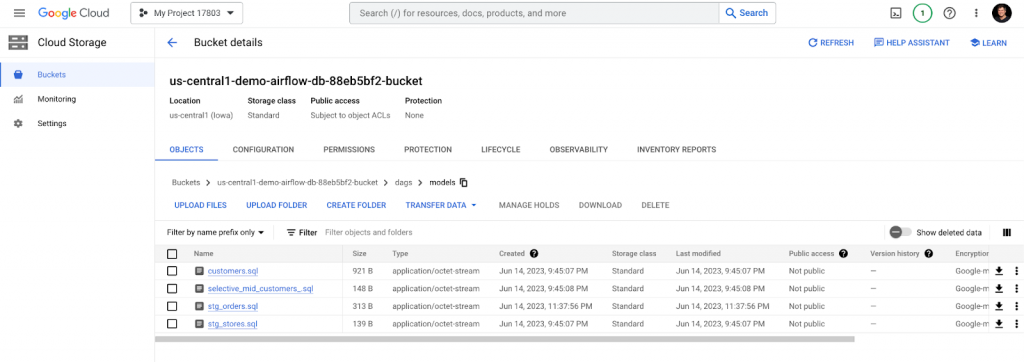
dbt models are stored under the folder. Upload models to newly created folder /dags/models
/data folder
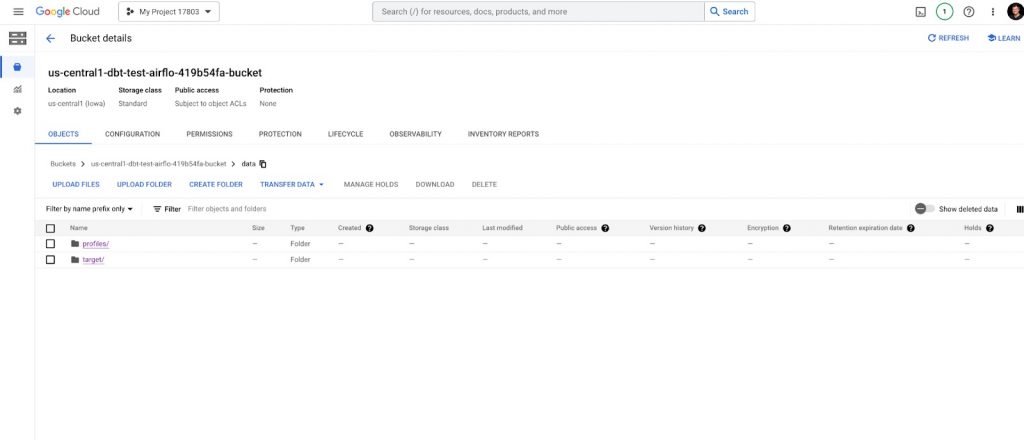
The data folder is stored in gs://bucket-name/data and is mapped to home/airflow/gcs/data mounted on all worker nodes.
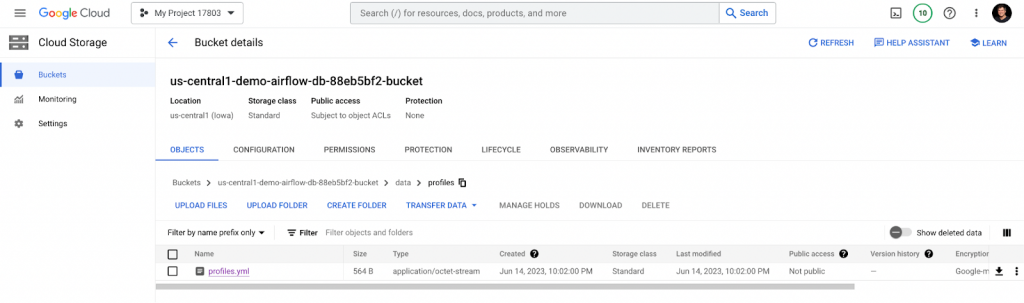
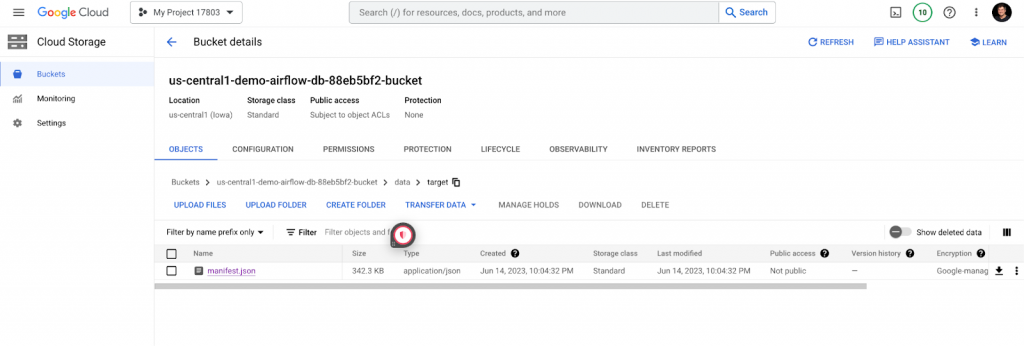
Under the data folder, create /profiles and upload profiles.yml to the /target folder and upload manifest.json to this folder.
The data folder should look like this:
And its /profiles and /target folders should look like this:
After uploading, let’s configure environment variables.
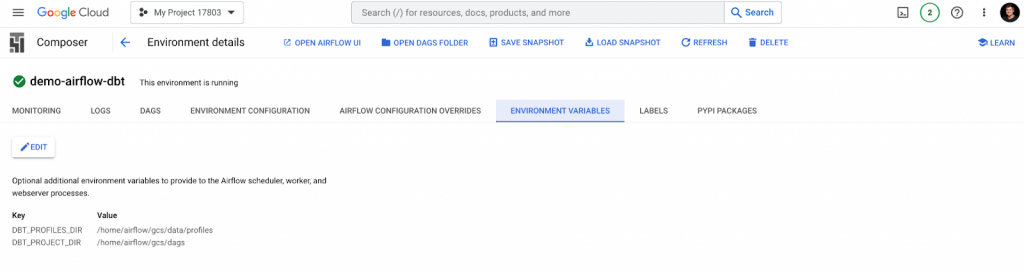
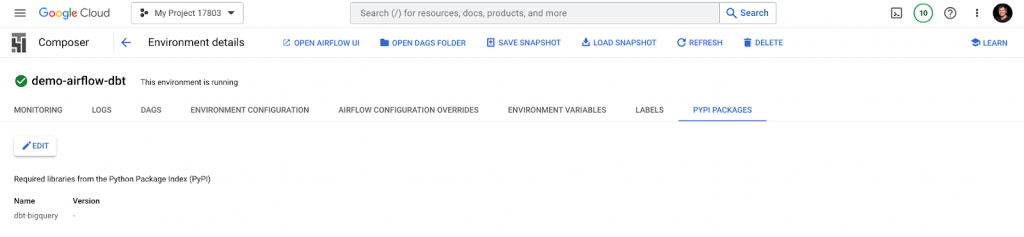
Also, make sure to add the required dependency under the Pypi Packages tab.
We have successfully configured the Cloud Composer environment and successfully deployed a new DAG and its dependencies to it.
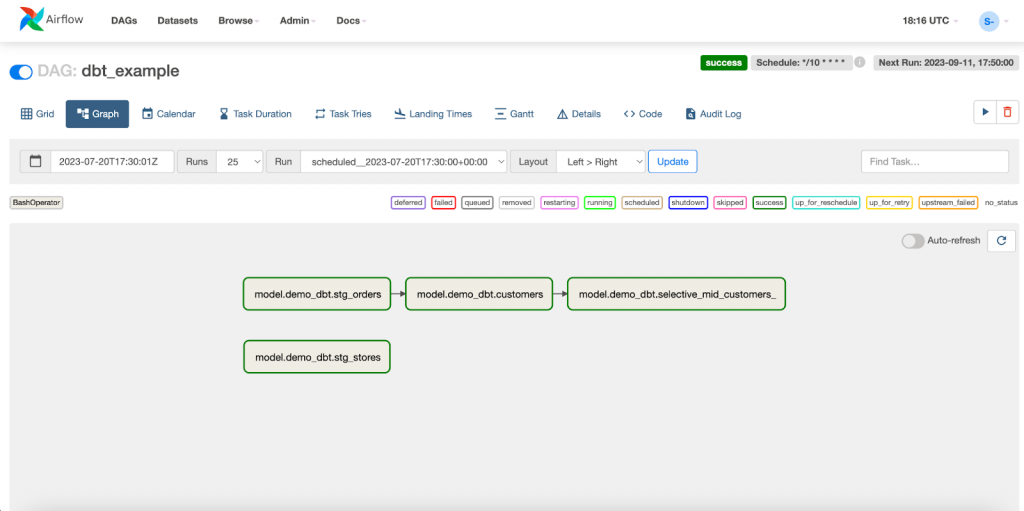
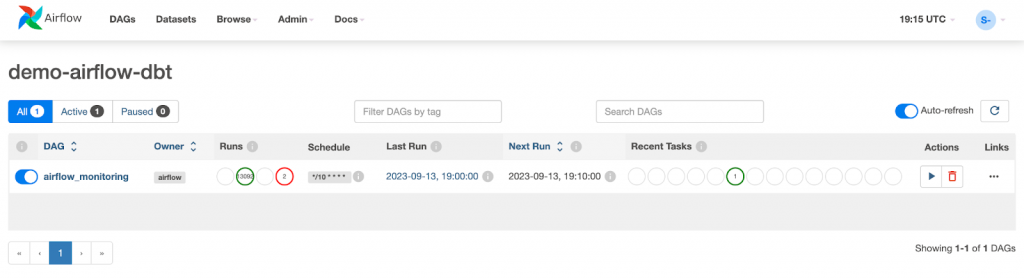
Now, let’s check our work and open the Airflow web UI link under the Environment Configuration tab in Cloud Composer.

The Airflow dag processor manager will automatically pick up a new dag and run it.
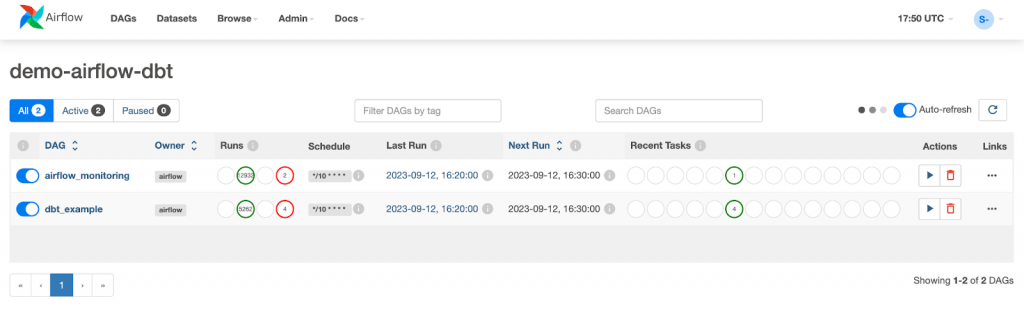
And all of the tasks from the graph should be green.
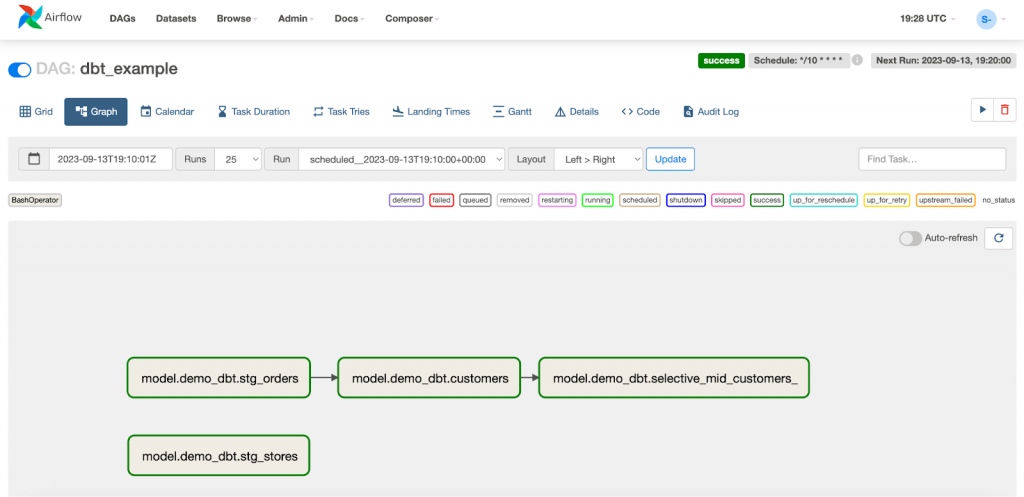
After successful models execution, 4+1 new tables should appear in BigQuery: dbt_dataset.stg_orders, dbt_dataset.stg_stores, dbt_dataset.customers, dbt_dataset.selective_mid_customers_, and an external table dbt_dataset.mh_customers_raw.
Great work! You have successfully created a dbt project and deployed it to Cloud Composer with Airflow.